vdu_controls - a DDC control panel for monitors
A control panel for external monitors (Visual Display Units).
Tip
Laptop-panels are supported in version 2.6 (see below).
Description
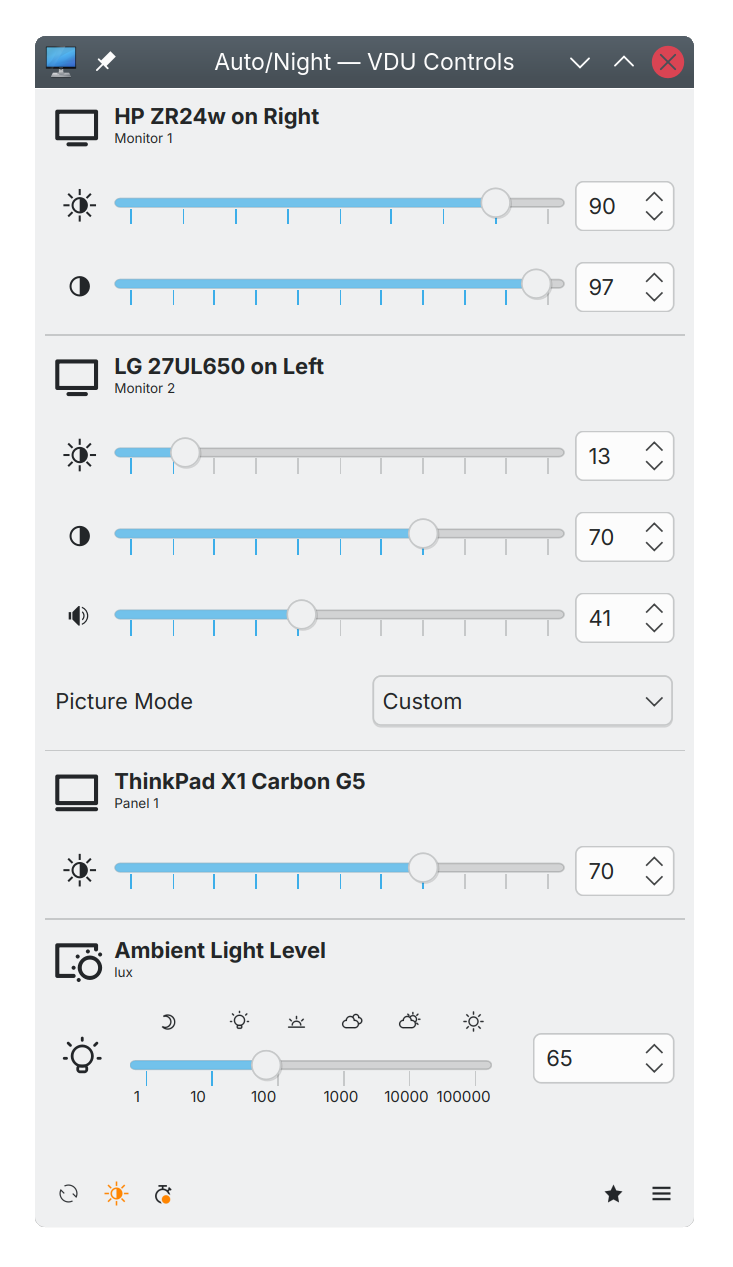
vdu_controls is a virtual control panel for external Visual Display Units
(VDUs, monitors, displays). It supports displays connected via DisplayPort,
DVI, HDMI, USB, and built-in laptop-panels (laptop-panel integration
is provided by brightnessctrl for brightness only).
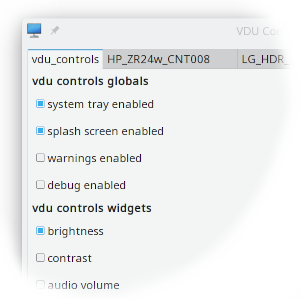
Controls include brightness, contrast, and audio - with additional options available in the Settings-Dialog.
Tip
A single ambient-light-level slider can simultaneously adjust brightness for all displays.
Each display can have its own custom brightness profile.
Quick start: see the Semi-Auto Howto
Warning
KDE 6 introduced energy saving brightness dimming after 5 minutes of idle time. This may interfere with changes made via vdu_controls, including scheduled-presets and ambient-light-control. The relevant KDE 6 options can be found under System Settings > System > Energy Saving.
Automatic Adjustment Throughout the Day
In versions >= 2.4, the ambient-light-level slider has been combined with an estimate of local solar-illumination to achieve semi-automatic brightness control throughout the day.
Adjusting the slider gives an indication of your perceived indoor illumination. This indoor value sets the ratio between indoor-illumination and outdoor solar-illumination. Once the ratio is set, it is used to automatically update brightness as the day proceeds.
Should the cloud-cover or weather change, adjusting the slider revises the ratio.
See the Semi-Auto Howto for a brief tutorial.
(Solar-illumination is estimated for a location by using the local date-time to determine a sun-angle, and from that estimates for illumination, and air-mass.)
Fully-Automatic Light-Metered Adjustment
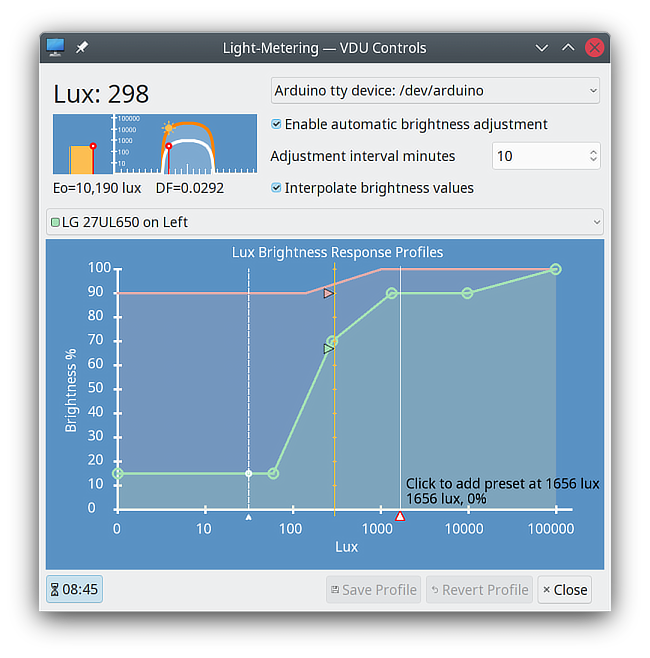
Several methods are supported for integrating a hardware light-meter to achieve fully automatic brightness control - see the Light Meters document. An Arduino light-meter can be built for around $10.
Presets for Saving Favorite Settings
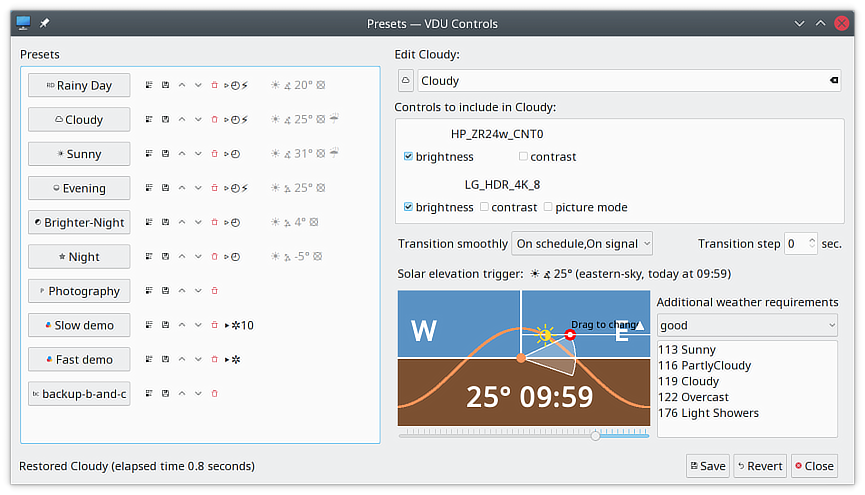
Favorite settings can be saved as named Presets, such as night, day, photography, movies, and so forth. Presets may be set to automatically trigger according to ambient light levels or solar-elevation, display hotplug-events, or UNIX signals.
Optionally resides in the System-Tray
The application may optionally run in the system tray of KDE, Deepin, GNOME, COSMIC, and Xfce (and possibly others). It automatically adapts to the different tray implementations.
Dynamic Light/Dark Theme Adjustment
The UI automatically adjusts to light and dark Qt desktop-themes.
Where a desktop supports Qt theming events, the UI dynamically adjusts
to light/dark theme changes. (For desktops that don't integrate with Qt/KDE theming,
the qt5ct and qt6ct utilities may be used to alter the overall Qt theme.)
Configurable Layout
To further assist with adapting to different desktops, the Settings-Dialog contains options for locating the main-toolbar at the top or bottom of the main-window. A futher option is provided for separating the status-line from the toolbar.
Offline and Online Help
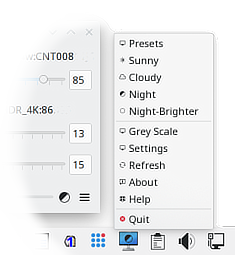
From any application window, use F1 to access help, and F10 to access the main-menu. The main-menu is also available via the right-mouse button in the main-window, the hamburger-menu item on the bottom right of the main window, and the right-mouse button on the system-tray icon. The main-menu provides ALT-key shortcuts for all menu items (subject to sufficient letters being available to support all user defined Presets).
Tip
The vdu_controls.1 man page is available online.
Sample Sceenshots


Tip
Within vdu_controls, tool-tips are often revealed when hovering over UI components.
Laptop-Panel brightness controls
Starting with version 2.6, laptop panels are supported for brightness-only control.
Laptop support is optional and controlled by the Settings > vdu_control globals > DDC options > laptop panel.
The command line utility brightnessctl is used to emulate DDC control of brightness. Brightnessctl is widely available and packaged for many distros.
vdu_controls will react to laptop brightness-function-keys or
inactivity-dimming. (The python3-pyudev library is employed to listen for
brigthness events.)
Control of other devices, such as motherboard LED's
Vdu_controls supports a DIY virtual-DDC plugin for scripting the
control of non-DDC displays or other devices such as keyboard-backlights or
motherboard-LEDs.
A plugin simply needs to emulate the dccutil command line interface, parsing simple text inputs and producing text outputs. It can be coded as a bash script or in any language that's appropriate to the task.
A sample sample script is available in the sample-scripts folder.
Technical background
Historically, there was little need to frequently adjust display brightness.
This changed with the introduction of displays offering HDR (High Dynamic Range)
and increased contrast. These newer displays can cope better with very bright
conditions, but they often need to be turned down when the ambient light level
decreases. I created vdu_controls to allow me to more easily adjust my own
displays.
VESA DDC
Many display manufacturers implement VESA DDC VCP, the VESA standard Display Data Channel (DDC) Virtual Control Panel (VCP) interface. DDC PC-to-Display DDC communication commonly takes place over DisplayPort, HDMI, DVI, or USB using the i2c protocol. The GPU manufacturers provide DDC support in their drivers.
DDC via ddcutil-service or ddcutil
vdu_controls communicates with DDC-capable displays by using one of two
interfaces:
- ddcutil-service, a D-Bus session-sevice interface to libddcutil.
- ddcutil, a command line DDC utility.
Both the command and the library provide a robust interface that supports numerous OEM DDC implementations and GPU drivers.
An Overview of ddcutil-service
I wrote ddcutil-service to access the faster API interface
provided by libddcutil. The connection caching in libddcutil often
results in significantly faster access when dealing with multiple displays.
By leveraging libddcutil, the service can pass DPMS and hotplug
events back to the client, events such as a monitor being powered down.
If ddcutil-service isn't available, vdu_controls automatically
falls back to the ddcutil command. he command doesn't cache
connections and needs to be rerun each time a display needs to be interogated
or changed. The rsponse time can also vary considerably depending on each
display's DDC implementation. Not being continuously running, the command
doesn't provide any facilities to monitor for events.
Being quite new, ddcutil-service is less commonly pre-packaged. If it
isn't available pre-packaged, a custom build may be possible. It only has
one C source file that depends on libddcutil and glib-2.0. The
service runs as user-session service under the current user's login. It
dosn't require any extra privaleges, libddcutil provides the necessary
udev access. It can be installed as an start-on-demand D-Bus service,
or it can simply be started from the command-line.
Does adjusting a VDU affect its lifespan or health?
Repeatably altering VDU settings might affect VDU lifespan. Possible reasons include the consumption of NVRAM write cycles, stressing the VDU power-supply, or increasing the LED panel burn-in.
How many writes VDU NVRAM can accommodate is unknown, it is likely to vary by model and vintage. VDUs from past decades are likely to have NVRAM that can accommodate 10,000 to 100,000+ writes depending on the technology used. For a ten-year lifespan this might indicate a sustainable limit of only 2.7 writes per day or 27 writes per day respectively.
Some modern types of NVRAM have upper limits that are for practical purposes unlimited. Brighter back-lights, along with scene and gaming options, would appear to require moving to NVRAM with increased durability. However, the uptake of such technologies by the manufacturers is unknown.
A vintage-2010 VDU, that has been used for four years of intensive testing of vdu_controls, now shows signs of the NVRAM having bad blocks. After loss of power the VDU will sometimes revert to its factory defaults, but not always, which suggests the NVRAM is being cycled through and only some of it is bad. This experience may indicate a write limit of at least 100,000 for a VDU of this vintage. I've subsequently implemented the initialization-preset feature as a fallback for failed NVRAM, so the problem with this VDU is, for the most part, eliminated.
All that said, vdu_controls does include a number of features that reduce
the frequency of writes to VDU NVRAM:
- Slider and spin-box controls only update the VDU when adjustments become slow or stop (when no change occurs in 0.5 seconds).
- Preset restoration only updates the VDU values that differ from the preset's target values.
- Transitioning effects and transition controls have been disabled for version 2.6.5 onward.
- Automatic ambient brightness adjustment only triggers a change when the proposed brightness differs from the current brightness by at least 10%.
There are also some things you can do to further minimise NVRAM writes:
- Drag sliders to target values with no in-between pauses greater than 0.5 seconds.
- Choose to restore pre-prepared ‘presets’ instead of dragging sliders.
- If using the ambient-light brightness response curves, tune the settings and curves to avoid frequent small changes.
- If using a light-meter, disengage automatic adjustment when ambient light levels are fluctuating (under conditions such as intermittent cloud cover).
- Consider adjusting the ambient lighting instead of the VDU.
Some feedback is provided to help with making reducing NVRAM usage:
- Hovering over a display name in the main window reveals a tooltip that includes the number of VCP (NVRAM) writes.
- The bottom of the About-Dialog shows the same numbers. They update dynamically.
Other concerns
Caution
Going beyond the standard DDC features by experimenting with undocumented-features or undocumented-values has the potential to make irreversible changes. Consider the potential cost in time and money before trying anything speculative.
The power-supplies in some older VDUs may buzz/squeel audibly when the brightness is turned way down. This may not be a major issue, in normal circumstances older VDUs are often not usable below 85-90% brightness.
Downloads
Pre-built Packages
An official package is available for OpenSUSE. Community packages exist for archlinux and Fedora.
Official openSUSE distributed package
OpenSUSE users can use zypper to install from the official openSUSE repo:
(I maintain the official openSUSE build.)Arch Linux AUR community packages
There is a community AUR package, packaged for many years by Mark Wagie (yochananmarqos):
Arch and Fedora OBS community packages
I use the openSUSE Build Service to build Arch and Fedora packages by under my mchnz OBS-login. These unofficial/community builds are only subject to my tests and checks, no one else vets them, they have no official standing.
- https://build.opensuse.org/projects/home:mchnz/packages/vdu_controls/repositories/Arch/binaries
- https://build.opensuse.org/projects/home:mchnz/packages/vdu_controls/repositories/Fedora_44/binaries
Caution
As well as the unofficial/community vdu_controls builds made by mchnz, there are other vdu_controls builds made by other community users for unknown purposes. All of these OBS builds are discoverable by search. It is exceptionally risky to use one of these other OBS builds without first establishing some confidence in its content and creator.
Installing from a Zipapp or Source Download
Warning
These instructions are for versions >= 2.6.5. For earlier versions, follow the instructions in the README.md included in the release tar or zip.
If vdu_controls isn't already available for your distribution,
you can download the runnable python-zipapp
vdu_controls.pyz asset from one of the GitHub Releases.
The asset vdu_controls.pyz is a runnable zip:
% python3 vdu_controls.pyz              # run the actual GUI
% python3 vdu_controls.pyz --install    # install into $HOME/.local

# Or manually install it:
% mv vdu_controls.pyz vdu_controls      # give it a better name.
% chmod u+x vdu_controls                # make it directly runnable.
If you want to use the latest source from master, it can be run directly, or it can
install itself into $HOME/.local/ as runnable python-zipapp. Here's how
to download it, check that it works, and install it $HOME/.local
- Download and unzip which creates a directory called vdu_controls-master
-
Directly run the app from the vdu_controls-master source.
-
Use the vdu_controls-master source heirarchy to install itself as python zipapp:
Although it's easily runnable, you'll still need to ensure you have the required dependencies available - see below.
Tip
The zipapp contains the source archive (along with a cache of pre-compiled files). Should you wish to make any tweaks directly to the unzipped code, you can do so and then uswe python to create a new zipapp:
Note
Development is trunk-based. It is my intention that the trunk (master) should always be usable as a daily-driver. If you want the latest features, download from master. That being said, a download of trunk may sometimes be less stable than downloading a release or package.
Dependencies
All the following runtime dependencies are likely to be pre-packaged on any modern Linux distribution
(vdu_controls was originally developed on OpenSUSE Tumbleweed).
- ddcutil >= 1.2, >= 1.4 recommended: the command line utility that interfaces to VDUs via DDC over i2c-dev or USB. (If anyone requires support for versions of ddcutil prior to v1.2 please contact me directly.)
- python >=3.9:
vdu_controlsis written in python and may depend on some features present only in 3.9 onward. - PyQt6 or PyQt5: the python GUI library used by
vdu_controls.
Optionally:
-
ddcutil-service provides a faster response from ddcutil and forwards display hotplug events.
-
pyserial required to use a serial-port light-metering device (only loaded if needed).
Optionally, for supporting laptop-panels (only used/loaded if laptop-panels are enabled in Settings):
- brightnessctl for retrieving and setting laptop-panel brightness.
- python3-pyudev for monitoring for changes due to auto-dimming and brightness-up/down-keys.
It's best to confirm that ddcutil is functioning before using vdu_controls:
- See https://www.ddcutil.com/config/ for instructions on configuring
ddcutil(including some extra steps for Nvidia GPU users). - See https://www.ddcutil.com/i2c_permissions/ for instructions on setting and testing the required permissions.
- Fo some VDUs, DDC/CI over Display-Port to Display-Port connections may work when others connections don't (mainly with some Nvidia GPUs).
Tip
As of ddcutil 1.4, installing a pre-packaged ddcutil will most likely set the correct udev rules to grant users access to the required devices. If you are using an earlier ddcutil, it may be necessary to follow all the steps detailed in the links above.
Installing
The script can self-install itself as desktop application in the current user's $HOME\.local
hierarchy, this will add it to the normal desktop application menu:
as Applications > Settings > vdu_controls by running:
That will install:
$HOME/.local/bin/vdu_controls
$HOME/.local/share/applications/vdu_controls.desktop
$HOME/.local/share/vdu_controls/icons/app/vdu_controls.png
Depending on which desktop you're running, menu changes may require logout before they become visible.
For system-wide installation it's probably best to use a distribution package, which is likely to install some or all of the following, typically to these locations:
/usr/bin/vdu_controls
/usr/share/applications/vdu_controls.desktop
/usr/share/licenses/vdu_controls/LICENSE.md
/usr/share/vdu_controls/icons/*
/usr/share/vdu_controls/sample-scripts/*
/usr/share/vdu_controls/translations/*
/usr/share/man/man1/vdu_controls.1.gz
Help
Detailed help can be accessed from the application's main-menu. The man-page is embedded in the application for offline use. The application help also includes a button to take you to online help. The online help has the advantage of having tables-of-contents, text-search, and additional help documents.
Customization
Whether run from the desktop start-menu or run from the command line, vdu-controls behaviour
can be altered in a number of ways:
- The Settings item in the main-menu.
- Command line options.
- Configurations files in
$HOME/.config/vdu_controls/
See the main-menu or the online help for details.
Localization
If Settings translations enabled is set, the application will load a translation matching your system's locale if available.
Caution
The supplied translations should be regarded as samples. They are unverified and may be incorrect.
To date, there hasn't been any expression of interest in the localization features. The existing translations mainly remain for testing purposes.
Where a supported locale is right-to-left oriented, layouts will be reconfigured appropriately.
Locale is determined by the Linux and Qt environment variables,
LC_ALL and LANGUAGE, which should preferably be in agreement.
These two environment variables can be manually set to force
a locale, for example:
See the translations folder to see what is currently available.
The following locations are searched for localized translations:
$HOME/.local/share/vdu_controls/translations//usr/share/vdu_controls/translations/zipapp-root/vdu_controls/resources/translations/
Both Qt .ts and .qm files can be used (.ts is plain-text, and .qs
is a compiled binary format). Because the translations are
unvetted, I've only provided editable text .ts files.
Anyone can easiliy make corrections to these text files without
having to use Qt's language tools.
Bugs and Suggestions
If you encounter a bug or issue, or wish to make a suggestion, you're most welcome to raise it on the issues page.
Development
I've set up the vdu_controls source as a typical Python development. The source
for the application proper is located in the src folder in the root of the
source tree, illustrated here:
src
├── vdu_controls
│   ├── *.py
│   ├── resources
│   │   ├── docs
│   │   │   ├── help_en_GB.md
│   │   │   ├── help.md
│   │   │
│   │   ├── icons
│   │   │   └── app
│   │   │       ├── *.{svg,png}
The vdu_controls sub-folder serves to provide a unique prefix for the application's own
imports, for example:
I don't normally use Python pip, building and distributing a zipapp is a good fit for a system utility. The zipapp is typically built as follows:
# Make a zipapp:
python3 -m zipapp src --output vdu_controls.pyz --main vdu_controls.__main__:main --python "/usr/bin/env python3"
# Run the result:
python3 vdu_controls.pyz
For those that do prefer to use pip, a standard python pyproject.toml is
included that will pull in the required Python dependencies:
# Create a user python virtual environment called my_venv an activate it
python3 -m venv my_venv
source my_venv/bin/activate
# Build, install, and run my_venv/bin/vdu_controls
pip install -e .
vdu_controls
There are configuration files for the Pandoc and MkDocs. There are util scripts that generate pandoc output and the MkDocs site pages:
My IDE for this project is PyCharm Community Edition.
Coverage testing is assisted by Coverage.py and Vulture. Type checking is assisted by pyright, and mypy. A small amount of testing of internal components is done by pytest, but being a GUI a fully automated set of tests would be complex to create and maintain. A small collection of testing hardware is employed along with some VM's in which I can run a ddcutil simulator.
My development Linux desktop is OpenSUSE Tumbleweed. The python3 interpreter and python3 libraries are from the standard Tumbleweed repositories.
Acknowledgements
- Sanford Rockowitz (rockowitz), for the robust ddcutil utility and all the friendly help and assistance.
- Mark Wagie (yochananmarqos), for Gnome related suggestions and AUR port.
- Denilson Sá Maia (denilsonsa), for many suggestions, assistance, and contributions.
- Matthew Coleman (crashmatt), Mark Lowne (lowne), usr3, Mateo Bohorquez G. (Milor123), Andrew Sun (apsun), Extent (Extent421), Niklas Hambüchen (nh2), Doron Behar (doronbehar), Mohammed Elsayed Ahmed (MohammedEl-sayedAhmed) for contributing enhancements and fixes to code and documentation.
- Jakeler, kupiqu, Mateo Bohorquez (Milor123), Johan Grande (nahoj), 0xCUBE, RokeJulianLockhart, abil76, Andrew Sun (apsun) for contributing suggestions for enhancements.
- Malcolm Lewis (malcolmlewis) for assistance with the OpenSUSE Open Build Service submissions.
- Christopher Laws (claws) for the BH1750 library and example build (lux-metering).
- Viktor Sharga (ViktorSharga) for assisting with UI enhancements.
- Mykyta Holuakha (Hummer12007) for brightnessctl
- E. Elvegård and G. Sjöstedt, "The Calculation of Illumination from Sun and Sky," Illuminating Engineering, Apr. 1940. Illuminating Engineering Society, 100 Significant Papers
- Plus others who have supplied feedback and suggestions.
Author
Michael Hamilton
License
This project is licensed under the GNU General Public License Version 3 - see the LICENSE.md file for details
vdu_controls Copyright (C) 2021-2026 Contributors to vdu_controls
This program is free software: you can redistribute it and/or modify it under the terms of the GNU General Public License as published by the Free Software Foundation, version 3.
This program is distributed in the hope that it will be useful, but WITHOUT ANY WARRANTY; without even the implied warranty of MERCHANTABILITY or FITNESS FOR A PARTICULAR PURPOSE. See the GNU General Public License for more details.
You should have received a copy of the GNU General Public License along with this program. If not, see https://www.gnu.org/licenses/.